Spotting a giant red tornado churning on the horizon is a moment every pirate crew lives for in Sea of Thieves. You can't ignore it—it's the telltale sign that the Ashen Winds World Event is active, and somewhere on a large island, Captain Flameheart's fiery lieutenants are waiting for a brawl. In 2026, the Ashen Lords remain one of the most rewarding and intimidating challenges you can tackle during your seafaring adventures. I've faced them dozens of times, and after countless singed beards and last-second escapes, I’ve nailed down the strategies that turn these towering infernos into piles of loot. Let me walk you through exactly how to conquer the Ashen Lords and walk away rich.

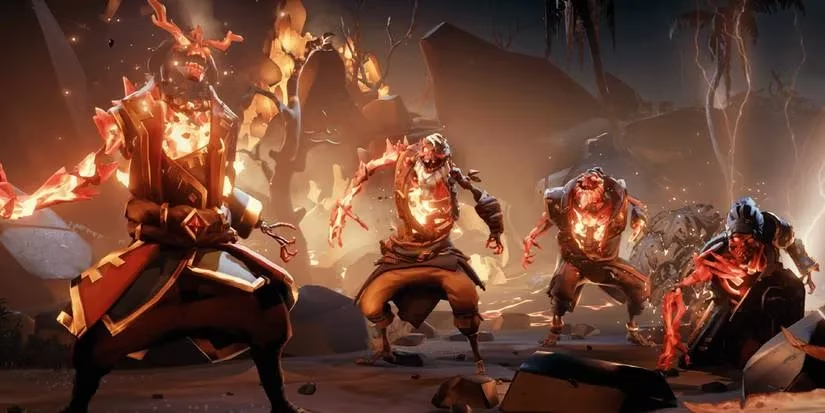
When I first sailed toward that vortex, I had no idea what I was getting into. As I approached the island—often Shipwreck Bay, Kraken's Fall, Devil's Ridge, or Cannon Cove—I saw a ring of Ashen Skeletons kneeling, their chant rising just before a towering figure erupted from the ground. That’s when the real fight begins. The good news? All four Ashen Lords—Captain Grimm, Red Ruth, Old Horatio, and Warden Chi—fight pretty much the same way. Once you learn the rhythm of their attacks, you can predict their next move and punish them hard. But don't get cocky; these battles are structured in three escalating phases, and one mistake can send your whole crew to the Ferry of the Damned.
Know Thy Enemy: The Ashen Lord’s Attack Arsenal 🔥
The Ashen Lords share a moveset that’s a hybrid of classic Skeleton Lord brawling and fiery chaos. Here’s exactly what they’ll throw at you:
-
Melee Swipe – Get too close and their giant fist sends you flying back with a chunk of health missing. Keep your distance.
-
Fire Breath – A cone of flame that roasts anyone in front of them. Sidestep or run perpendicular as soon as you see the fire gathering in their mouth.
-
Lunge Attack – They leap across the arena to close the gap. Dodge at the last second to avoid damage and the knockback.
-
Boulder Throw – A small rock is annoying, but the large boulder sets you on fire on impact. Watch their wind-up to know which one is coming.
-
Summon Skeletons – They’ll call in two waves of Ashen Skeletons. Clear them quickly so they don’t overwhelm you during the more dangerous attacks.
-
Ash Cloud – A thick, choking smoke that blinds you and muffles sound. Stay mobile so you don’t get jumped while you can’t see.
-
Shockwave – A ground slam that explodes outward, setting you alight and launching you. Deadly at close range, and it’s only used in phase 2 and 3.
-
World’s End – The nightmare attack. Flaming boulders rain from the sky, the surrounding water boils, and it can one-shot you or cripple your ship. Exclusive to phase 3.
Understanding these moves is half the battle. Once you know what’s coming, positioning becomes everything.
The Three Phases: Reading the Fight 📉
An Ashen Lord starts with around 8000 HP, and the battle shifts dramatically as you whittle them down. The key is to watch for them dropping to one knee—that’s your visual cue that a new phase is starting. During that brief immobilization, they can’t attack, so unload everything you’ve got, but be ready to back off the moment they stand.
| Phase | HP Threshold | New Attacks | Strategy Note |
|---|---|---|---|
| Phase 1 | 100% – 75% | All basic attacks except Shockwave and World’s End | Safest phase. Focus on dodging and chipping away with cannons or snipers. Clear skellies fast. |
| Phase 2 | 75% – 50% | + Shockwave | Stay at mid-range. The slam can one-shot if you're too bold. Keep the ship angled for cannon support. |
| Phase 3 | 50% – 0% | + World’s End | The chaos peaks. Move far from your ship if possible, and hide under natural cover when the sky ignites. Never stop moving. |
I’ve learned the hard way that rushing in during Phase 3 usually ends with a volcanic rock crushing my skull. Patience wins this fight. When the World’s End attack triggers, the island vibrates and the sea around you starts to boil—get under a rock overhang or inside a cave mouth if you can. Your ship should be anchored far enough from shore that a direct hit is unlikely, but close enough that your crew can still fire cannons.
Gearing Up Before the Red Tornado ⚓️
You don’t sail toward an Ashen Lord without serious preparation. I always overstock on coconuts, cooked meat, and at least three full pineapples. Your ship’s cannonballs must be plentiful because you’ll rely on ranged firepower. Once you hit the island, scoop up any ammo pouches and find a fight location that ticks three boxes:
-
Near water, so you can douse yourself when you inevitably catch fire.
-
Near solid cover (large rocks or ruins) to shield against World’s End meteors.
-
Within cannon range of your ship, but not so close that the ship becomes a sitting duck in Phase 3.
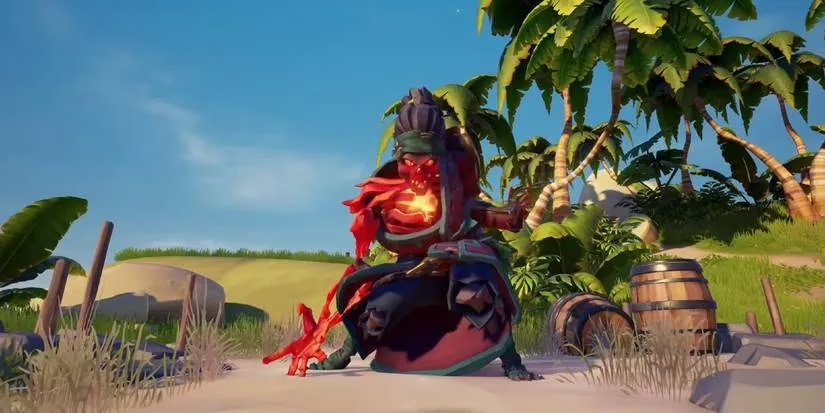
Weapons matter too. Trust me, firebombs and the Ashen Winds Skull you might earn won’t scratch an Ashen Lord. Instead, I love the Eye of Reach for constant headshot damage, and if you come across a Trident of Dark Tides, charge it up to melt their health bar. Avoid gunpowder kegs—they almost always detonate prematurely thanks to all the stray flames.
Battle Rhythm: How I Survive (and Win) 💡
Here’s the loop that’s kept me and my crew afloat against even the angriest Ashen Lord:
-
Phase 1 – Peel and Punish: I park the ship with broadside cannons aimed at the boss. One pirate stays on cannon, the others aggro the Lord away from the ship and dodge attacks. When the summons come, we collapse on the skeletons immediately.
-
Phase 2 – Mind the Shockwave: As soon as the Lord stands from the first kneel, I call for everyone to spread out. The shockwave is a ring—jump right before it hits to minimize knockback. Our cannoneer keeps firing, aiming for headshots.
-
Phase 3 – Cover is King: When the second kneel ends and World’s End begins, we abandon cannon safety and scatter to pre-identified cover. I alternate between peeking to shoot and hiding as boulders land. The boiling water is terrifying, but staying still kills you faster. Keep moving, pop healing items, and focus pressure on the Lord’s head.
One pirate on bucket duty near the ship can save it from fire, but that player must also know when to run inland. Communication is everything—call out “Shockwave!” or “World’s End incoming!” so everyone reacts fast.
The Spoils and the Peril That Follows 🏆
When the Ashen Lord finally crumbles, geysers on the island erupt with treasure. You’ll get a Chest of Rage, a Ritual Skull, and around fifteen pieces of Ashen loot or Devil’s Roar valuables. The Ashen Winds Skull is the crown jewel—a literal flamethrower you can use on future adventures. But don’t let your guard down the second you start loading the ship. The island can still spawn Skeleton Captains, and a Kraken often lurks just offshore, waiting for a distracted crew. I’ve lost entire hauls because we were too busy celebrating. Keep an eye on the horizon, and have an escape route ready.
So next time you spy that red tornado, don’t hesitate. Stock your ship, rally your crew, and head into the storm. With these tactics, you’ll send Captain Flameheart’s commanders back to the depths—and turn their fury into your fortune. Fair winds and following seas, pirate.