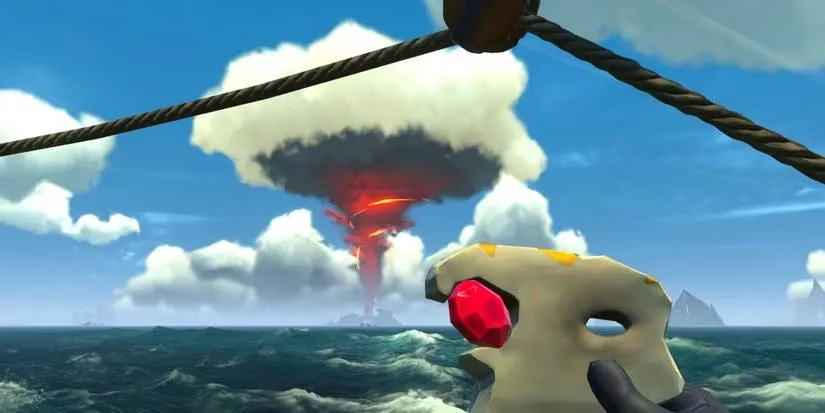
Beneath the ever-shifting skies of the Sea of Thieves, a tale of cosmic intrigue and cursed fate continues to unfold. As the year 2026 sees the world of pirate adventures grow ever richer, the echoes of past legends still beckon the daring. 'The Secret Wilds', the eleventh time-limited Adventure, invites players to trace the celestial path of the infamous Captain Briggsy, a figure whose quest for a cure to the dreaded skeleton curse has become woven into the fabric of pirate lore. This journey, a direct continuation from 'The Rogue's Legacy', places the fate of Tasha—Briggsy's devoted fan, now afflicted by the very curse her idol sought to break—squarely in the hands of those who would sail the treacherous seas. While many seek the power of the skeleton curse for the thrill of on-demand PVP combat, this Adventure asks a different question: can a curse born of starlight be undone by the same? The answer lies hidden in dark constellations and scattered memories, waiting to be pieced together under the guidance of a spectral mask and a pirate's resolve.
Embarking on this 2 to 3-hour celestial hunt requires both a sharp eye and a patient heart. The core objective is clear: discover nine dark constellations across three distinct islands to unlock three of Briggsy's chests, each containing a fragment of a powerful amulet. Yet, is the journey merely about the destination? For completionists and lore-seekers, five additional, optional memories of Briggsy await, scattered across the map, offering deeper glimpses into the captain's storied past. The Adventure begins, as many do, with a conversation. Seek out Larinna, the ever-present figure outside any outpost tavern, and choose to 'Begin Adventure'. She will direct you to Plunder Outpost and the Order of Souls tent, where Madame Olivia and the afflicted Tasha hold the first keys to the mystery.
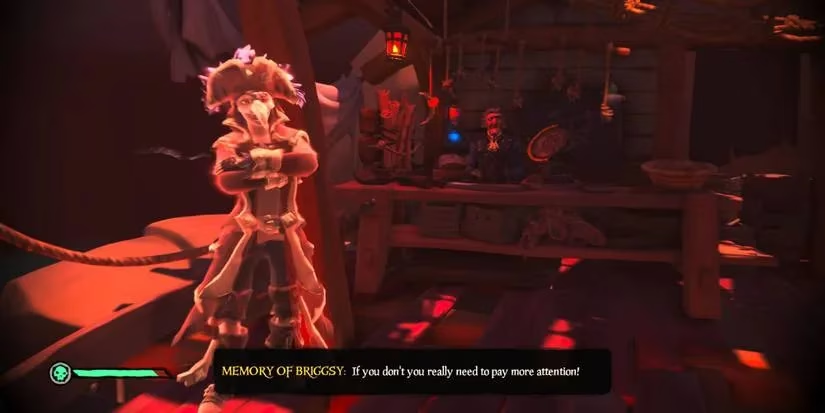
From Madame Olivia, pirates receive the essential tools for their quest: Tasha's journal, filled with cryptic clues; a fractured piece of Briggsy's amulet; and most crucially, Captain Briggsy's Mask. This is no ordinary trinket. When donned, it reveals a hidden sky, one etched with constellations invisible to the naked eye. But using it is an art in itself. One must find the precise spot on each island, often guided by a swelling, ethereal melody, stand firm, and gaze upward. The challenge? To physically move and align the pirate's perspective until the scattered points of starlight coalesce into a recognized form—a butterfly, a panther, an hourglass. Only then does the constellation activate, granting a vision of Briggsy's memory and revealing the location of a key or a chest buried beneath the sand.
The hunt unfolds across three primary islands, each holding three constellations and one of Briggsy's sealed chests. Let us chart the course:
The Wilds: Crooked Masts (O11)
This twisted island serves as the first proving ground. Here, pirates must decipher the shapes hidden in the heavens.
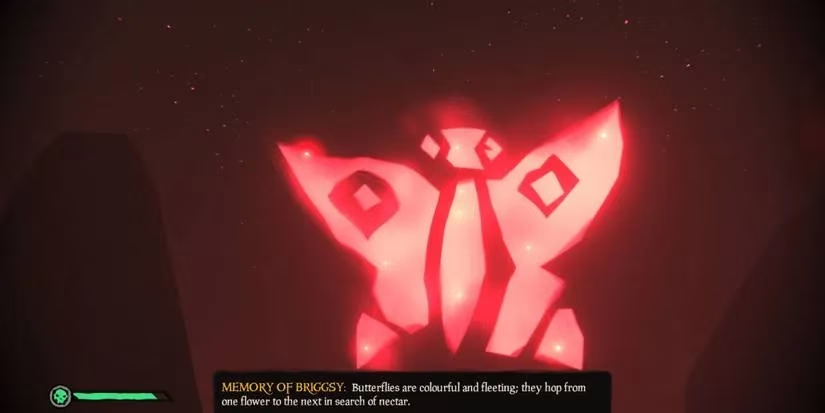
- The Butterfly (Central Bridge): Navigate to the island's heart, beneath the bridge. Stand on the northeast corner near the altar, look up towards the bridge structure, and use the mask. Align the stars to form the butterfly from Tasha's journal. Dig to claim the Crown Key.
-
The Second Butterfly (Southern Cliff): Ascend the southern cliffs. Near palm trees beside a rock adorned with a Kraken painting, look west with the mask to find and align another butterfly constellation. Dig to unearth the Chalice Key.
-
The Mountain (Northern Peak): Scale the highest northern cliff. Among barrels and palms, listen for Briggsy's awed whisper. Look up to align the imposing mountain constellation. Dig here to find Briggsy's first chest. Use your gathered keys to open it and secure the first amulet fragment.
Old Faithful Isle (M4)
The journey continues to this geothermal wonder, where new shapes grace the sky.
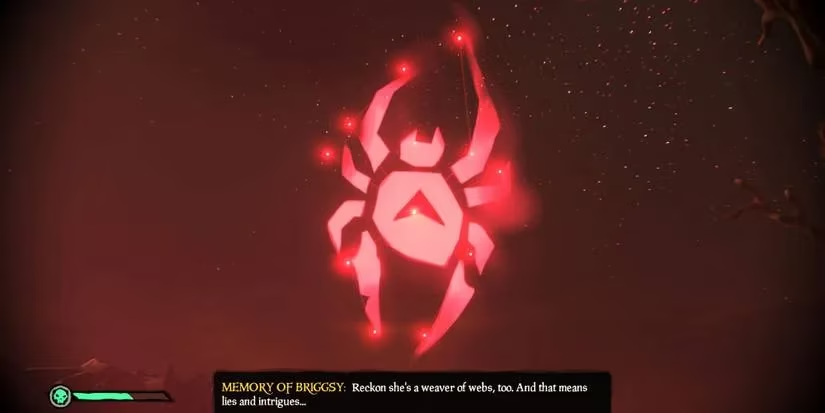
- The Black Widow (Upper-East): Seek a tree near a tall wooden construction on the upper-east side. Gazing northwest with the mask reveals the intricate form of a black widow spider. Dig to retrieve another Crown Key.
-
The Panther (Southwest): In the rocky southwest corner by two barrels, with a broken bridge in view, look up to find and align the sleek panther constellation. The Chalice Key awaits below.
-
The Palm Tree (Island Center): At the island's midpoint, trigger the palm tree constellation. Dig to uncover the second chest and claim another stone fragment for the amulet.
Marauder's Arch (Q3)
The final leg of the primary quest brings pirates to this iconic archipelagic fortress.
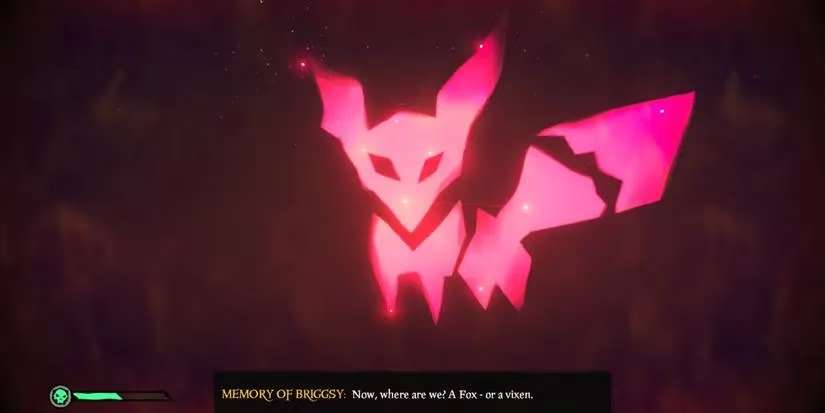
- The Fox (Southern Cave): Dock north and enter the cave on the southern landmass. From inside, looking out and upward, align the clever fox constellation. Dig to obtain the final Crown Key.
-
The Hourglass (Fortress Interior): Enter the large ground-level fortress to the east. Inside, look up to connect the stars of the hourglass. Dig for the last Chalice Key.
-
The Waterfall (Northern Peak): Cross the rocky bridge to the highest northern peak. At the very edge, align the final constellation—a cascading waterfall. This reveals the third and final chest. Open it, combine the amulet fragments, and behold the fully assembled artifact.
With the amulet complete, a spectral scene with Captain Briggsy herself awaits, deepening the narrative mystery. Before departing, sharp-eyed pirates should scour the ground for missing journal pages and the Warsmith's cannonball. Then, the choice presents itself: return to Madame Olivia at Plunder Outpost to conclude the Adventure, or set sail once more to seek the whispers of the past? For those who choose the latter, five optional memories of Briggsy await discovery. These are not tied to constellations but to specific, poignant locations where the mask must be worn:
| Location | Memory Trigger Point |
|---|---|
| Thieves' Haven | Northwest beach, palm tree between small & large arch. |
| Crooks' Hollow | Cave south of island, next to scarab rock painting. |
| Ancient Spire Outpost | Inside the Unicorn's Tavern bar, at island summit. |
| North Star Seapost | Standing beside Sudds, the star-gazing scholar. |
| Lone Cove | West beach, grassy embankment by a lone palm tree near the edge. |
The rewards for navigating this starlit odyssey are both tangible and prestigious. All who complete the core Adventure are granted Briggsy's Mask, not just as a tool, but as a beautiful trinket to display with pride on their captained ship. Those who go above and beyond, completing all deeds and uncovering every secret, earn the illustrious title of The Dark Stargazer. Furthermore, the treasures and chests recovered during the voyage can be sold for gold and reputation with Trading Companies like the Order of Souls or Gold Hoarders. What greater prize is there, though, than the satisfaction of charting a course by starlight and becoming part of a legend? 'The Secret Wilds' is more than a simple fetch quest; it is a poetic interlude in the grand symphony of the Sea of Thieves, a reminder that the greatest treasures are often the stories we help unfold beneath the vast, uncaring, yet beautifully patterned sky.